
For week 2 I mainly focused on continuing developing my concept and starting to build my initial prototype for the installation I am planning to build.
Title:
"Interactive Installation for Educating Culture Context in Museum"
One sentence summary:
An interactive museum installation that helps visitors unfamiliar with a culture or artifact type intuitively learn about its cultural background and significance through a muti-sense experience.
Brief description:
Visitors who are not familiar with a culture or type of artifact may struggle to understand its historical and cultural significance, especially when explanations are either too minimal or overly complex and wordy. This project aims to find a new way to educate cultural context that is engaging, impressive, and easy to understand for all visitors.
End goal:
The installation will be placed on-site in museums and will use a storyline with characters, a physical interface, and multi-sensory interactions—including touch and smell—to provide visitors with an initial but sufficient understanding of the artifacts on display.
Main touch points for how a visitor interact with my installation in the museum scenario.

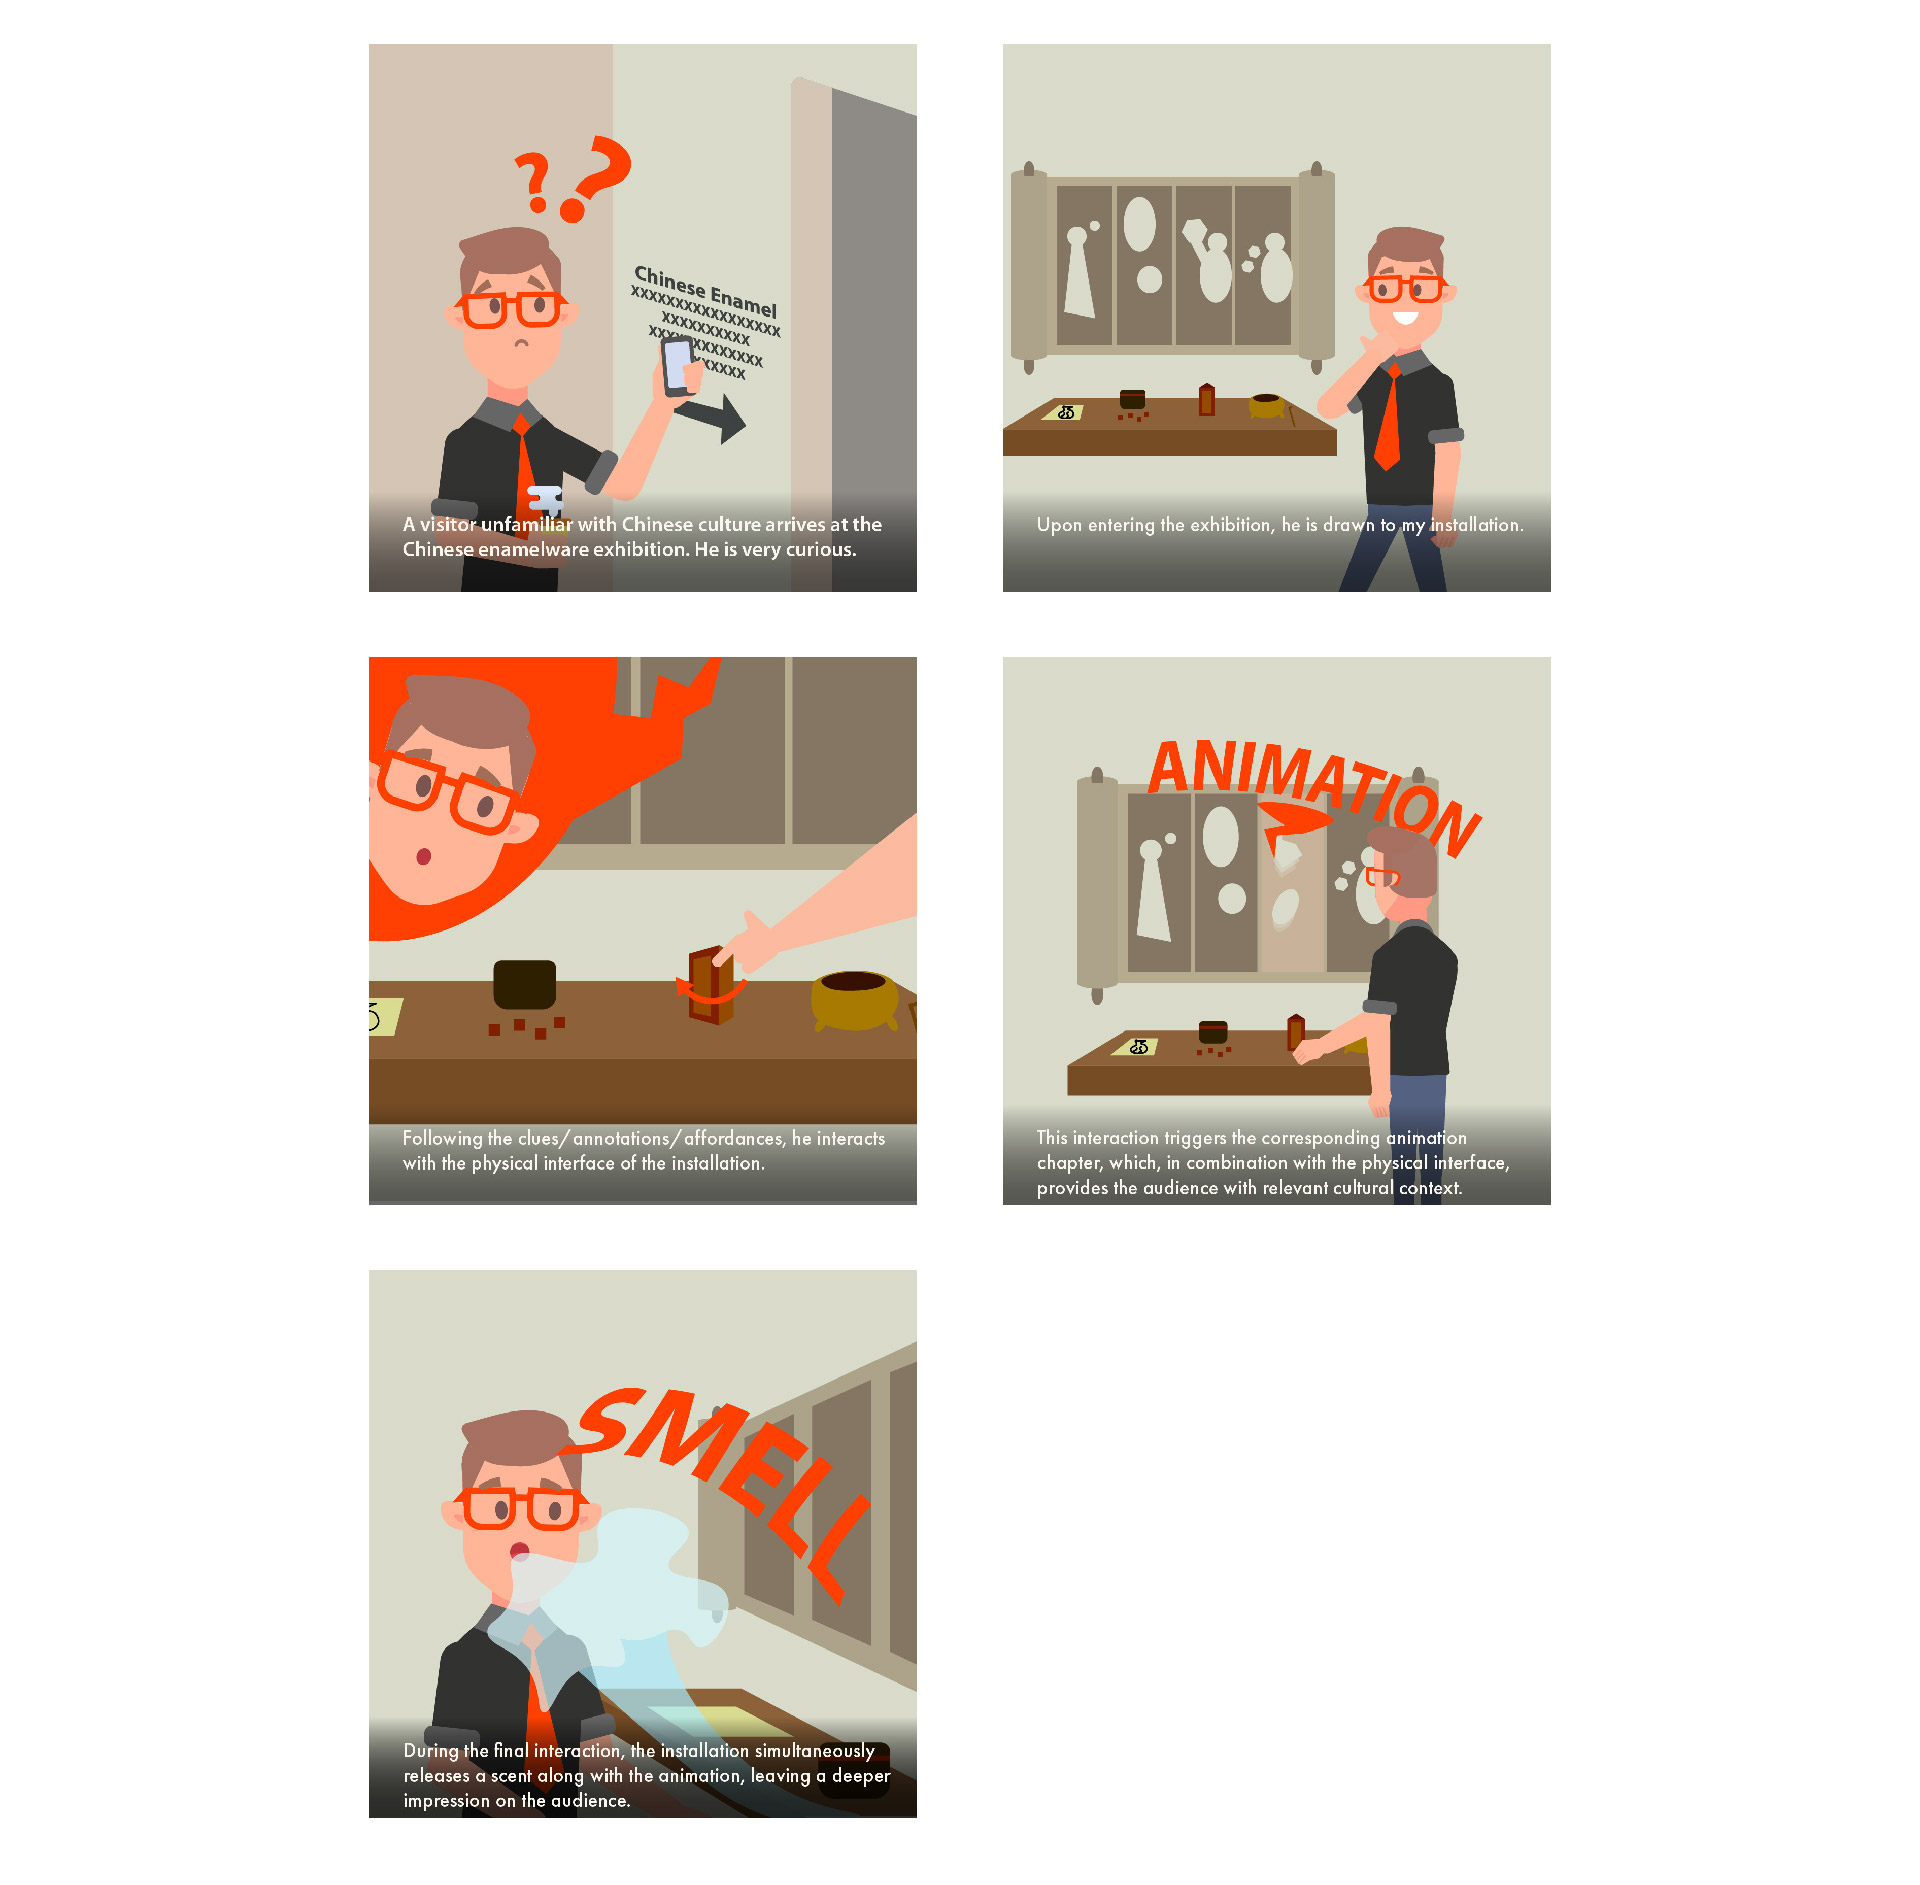
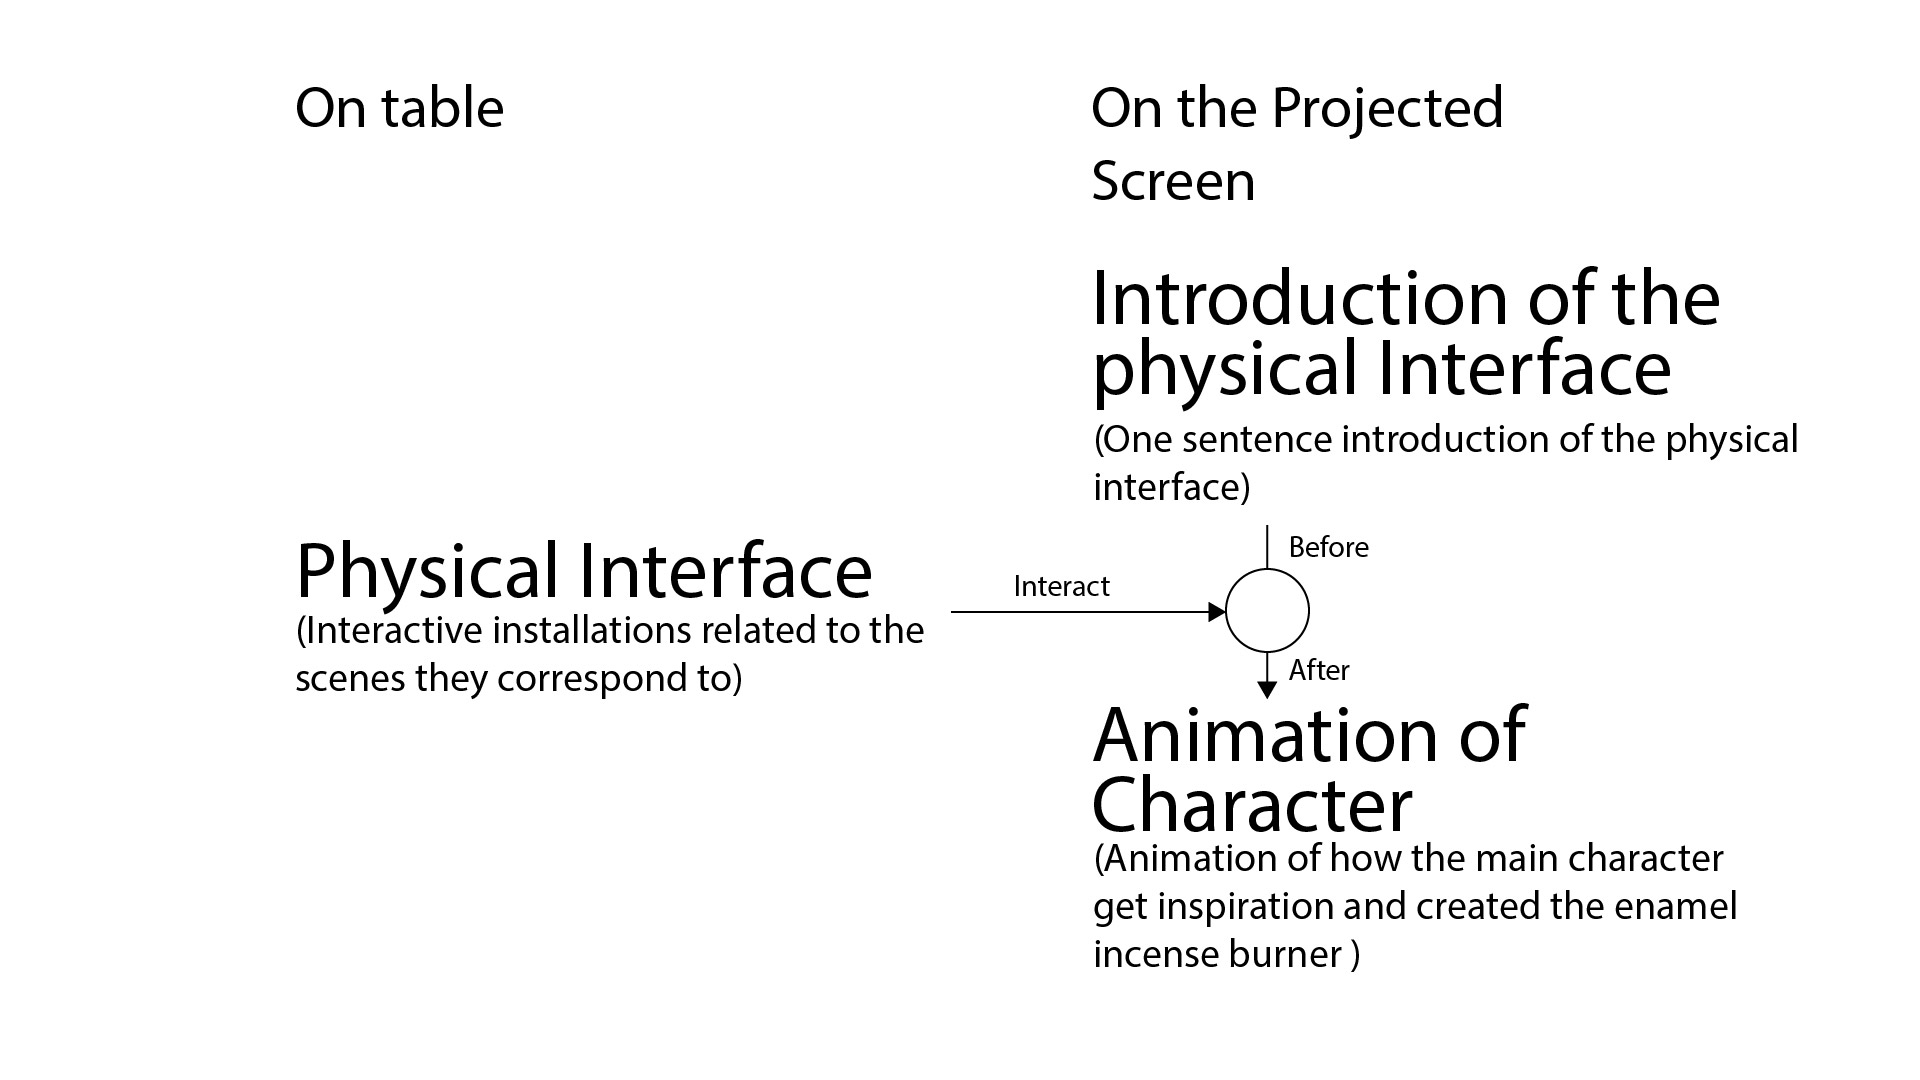
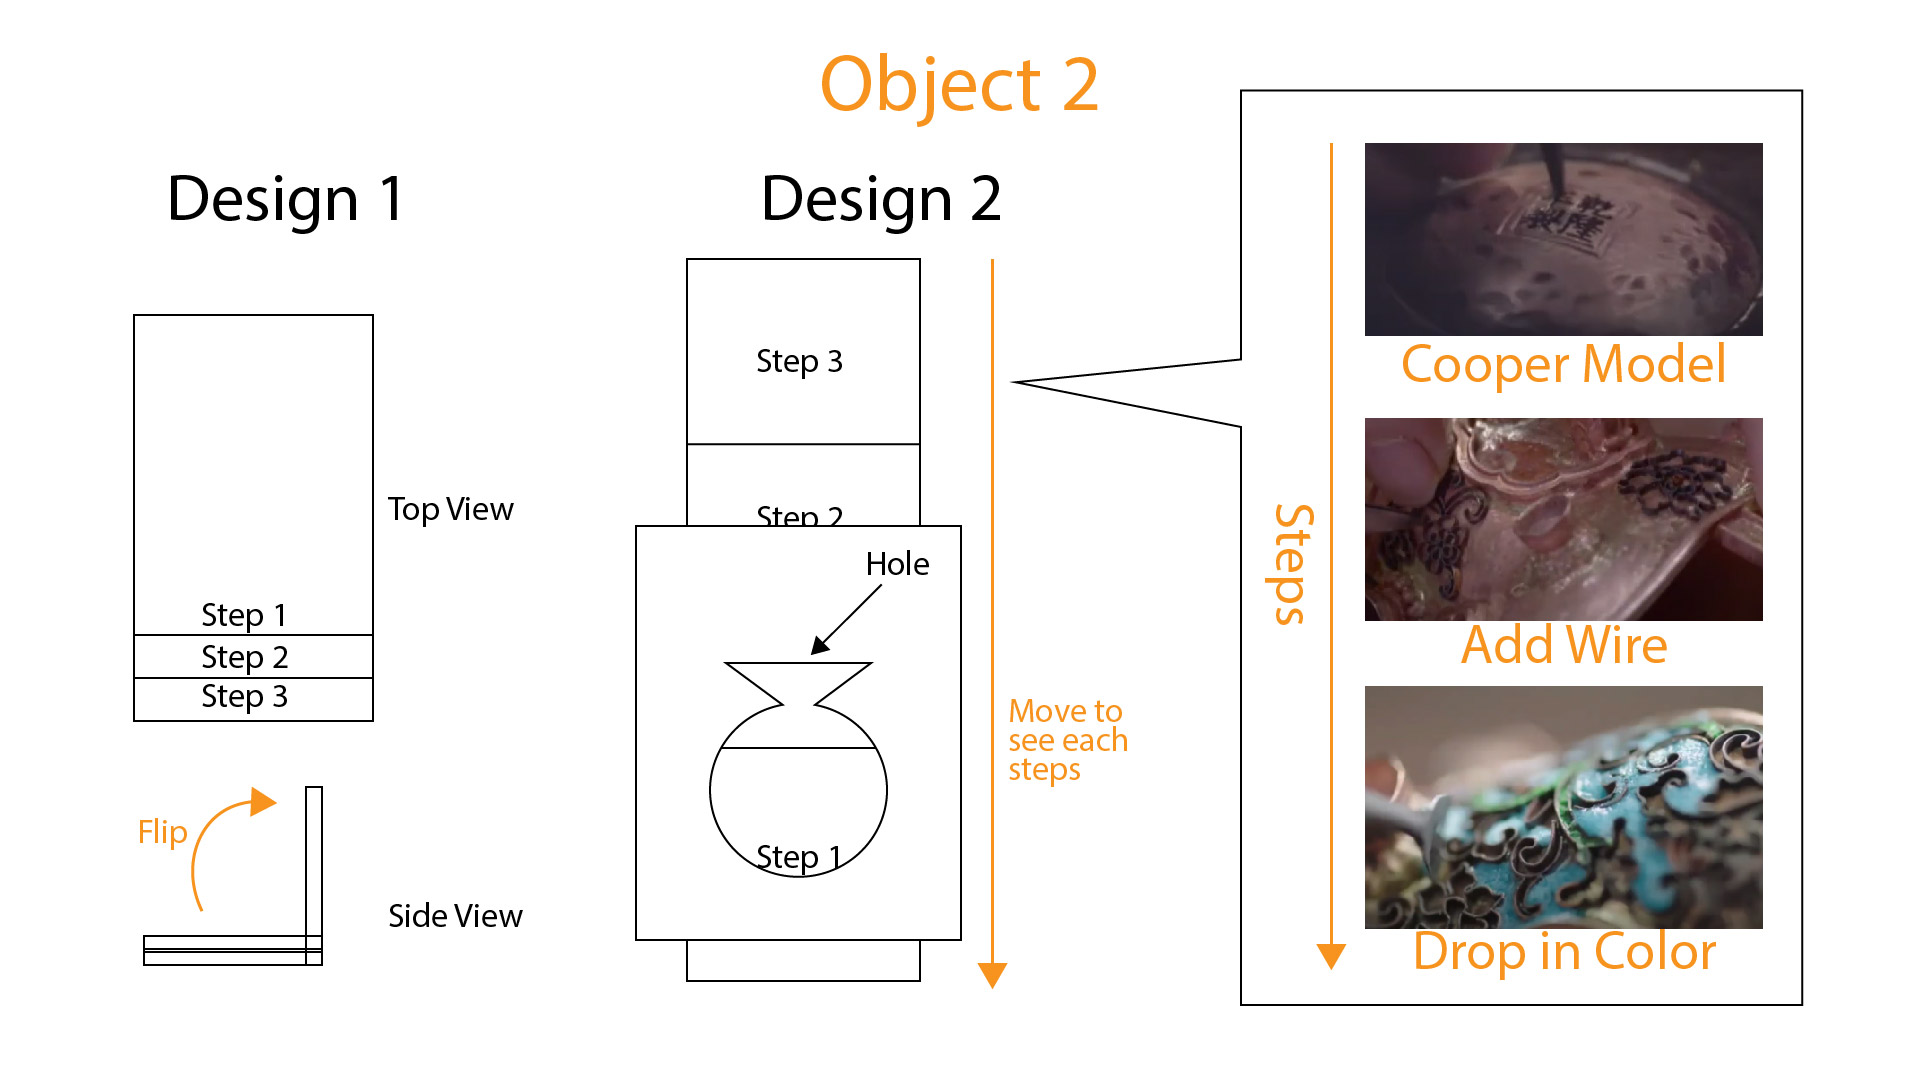
My installation consists of two main components: a projected "screen" and a physical setup on a table. Before users trigger the animation through the physical setup, the screen displays an introduction to the physical objects. Once triggered, the corresponding chapter of the animation plays, telling the story of how the protagonist gains inspiration and creates a cloisonné incense burner.
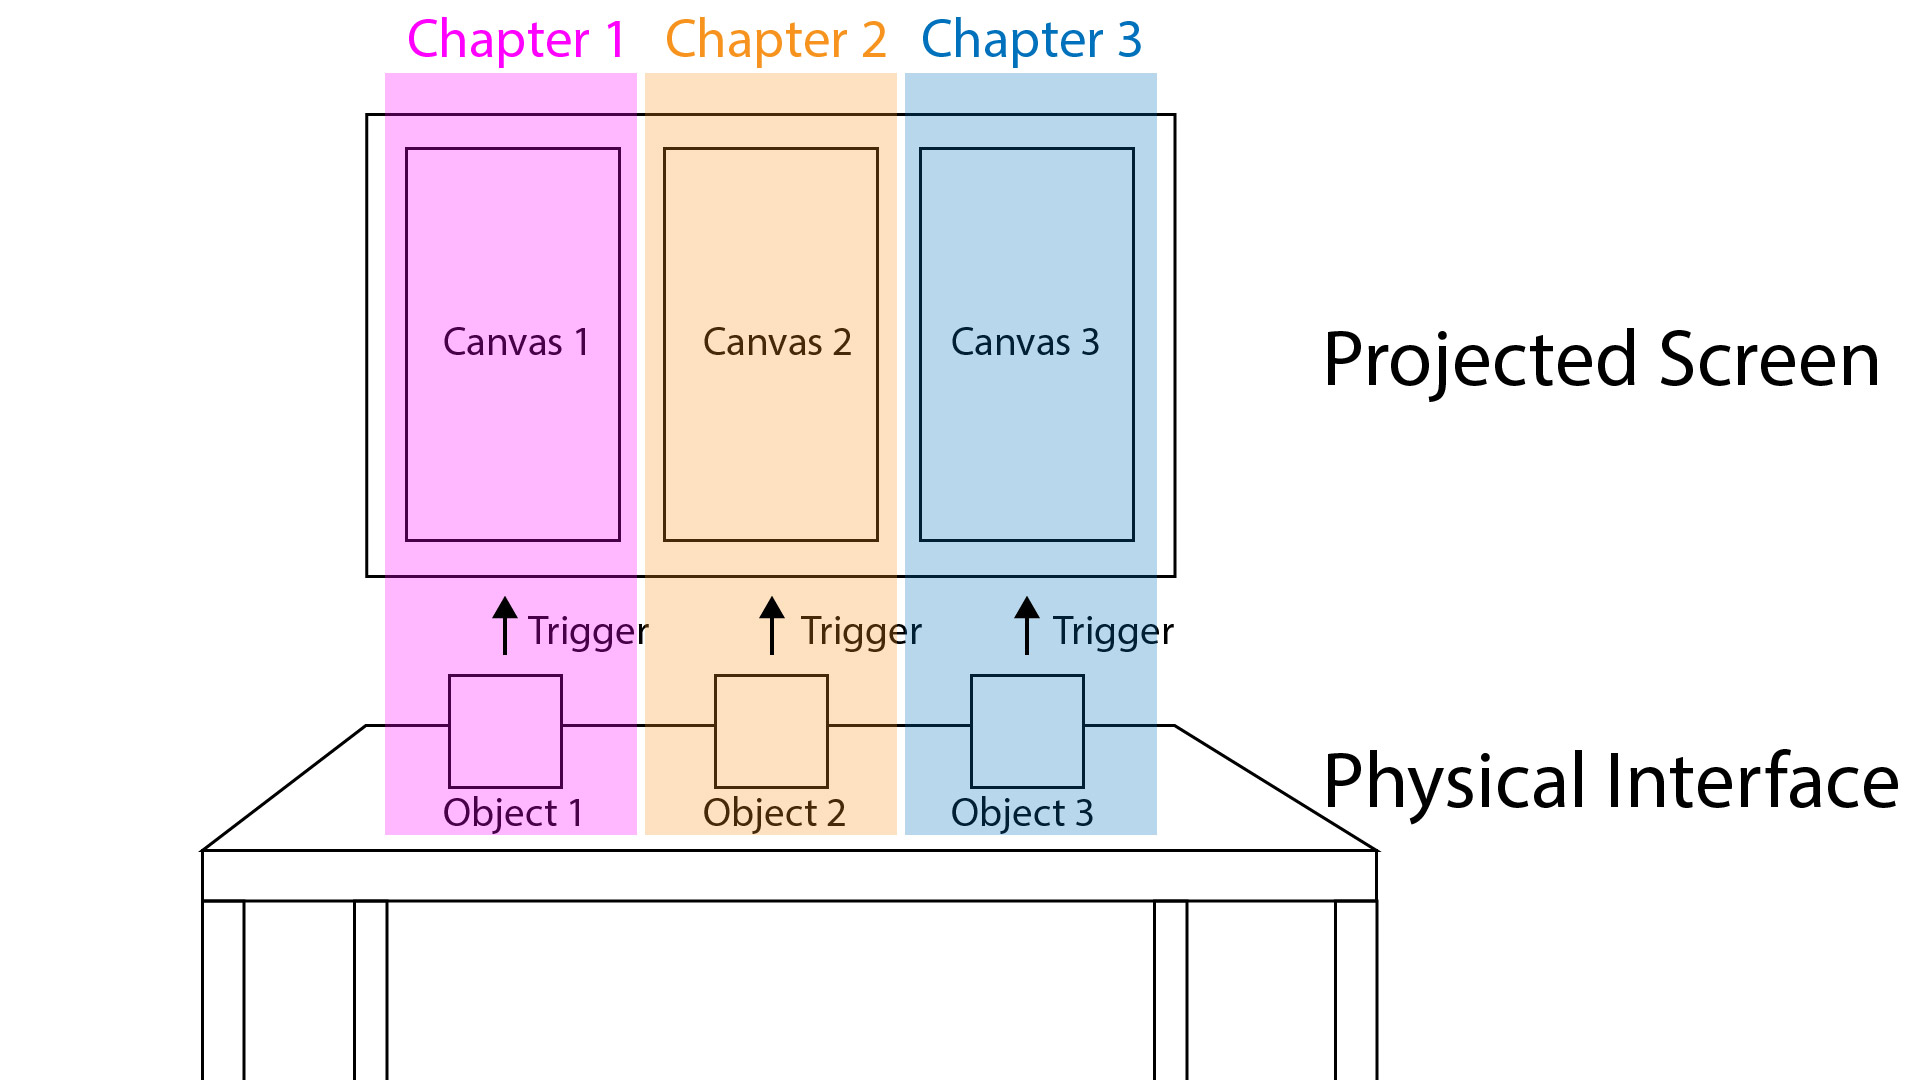
The story is divided into three chapters, with each set of physical objects and animations forming a group. Each physical object are a prop that would appear in the story. Although the three chapters form a continuous narrative, each chapter highlights a different cultural aspect of that period. The first chapter focuses on the trade and cultural exchange between China and other countries at the time; the second chapter explores the craftsmanship of cloisonné enamelware production; and the third chapter delves into the incense culture of that era.
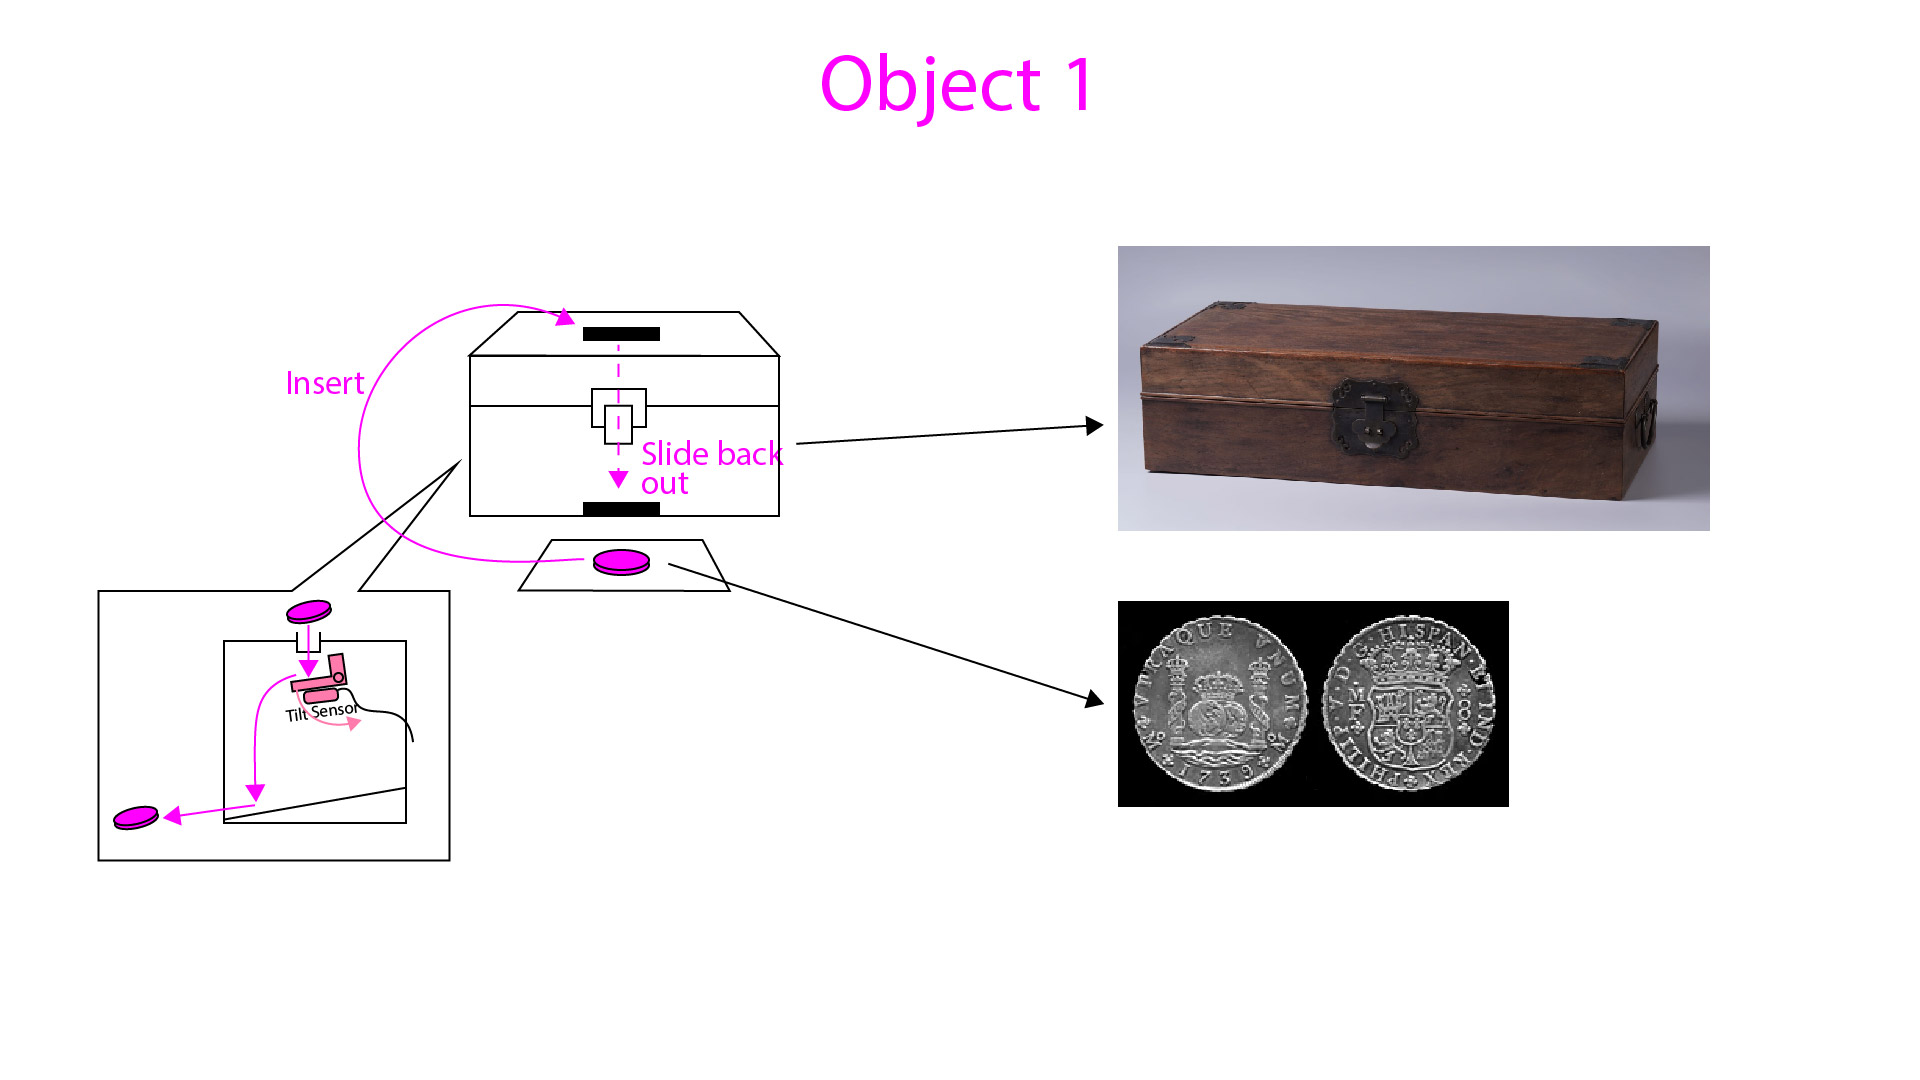
The protagonist of the story is a craftsman. The newly appointed emperor finds the previous incense burners too plain and lacking vibrant colors, so he issues a decree for the protagonist to develop a new incense burner. Feeling troubled, the craftsman takes a walk through the marketplace, where he happens to see foreign merchants selling a few Byzantine cloisonné enamel ornaments. He purchases them using a Spanish silver coin and, inspired by their intricate designs, sketches his ideas. (The corresponding physical object is a Spanish silver coin, symbolizing the trade and cultural exchange between the Qing Dynasty and other countries at the time.)
In the second chapter, the story focuses on the craftsmanship of cloisonné enamelware, depicting the process of forging the copper mold, shaping the metal wires, applying colors, and firing the enamel. (The corresponding physical object allows users to touch and feel the materials at different stages of the process.)
The third chapter tells the story of the protagonist crafting incense and presenting the completed incense burner to the emperor. (The corresponding physical object enables users to see the materials used in making incense and, through a humidifier module, experience its scent.)

My main source of inspiration is Chinese shadow puppetry, as this form of performance, like cloisonné enamel, reached its peak during the Qing Dynasty. At the same time, I also explored Chinese paper-cutting materials, as it shares similarities with shadow puppetry in terms of material use and abstract expression.
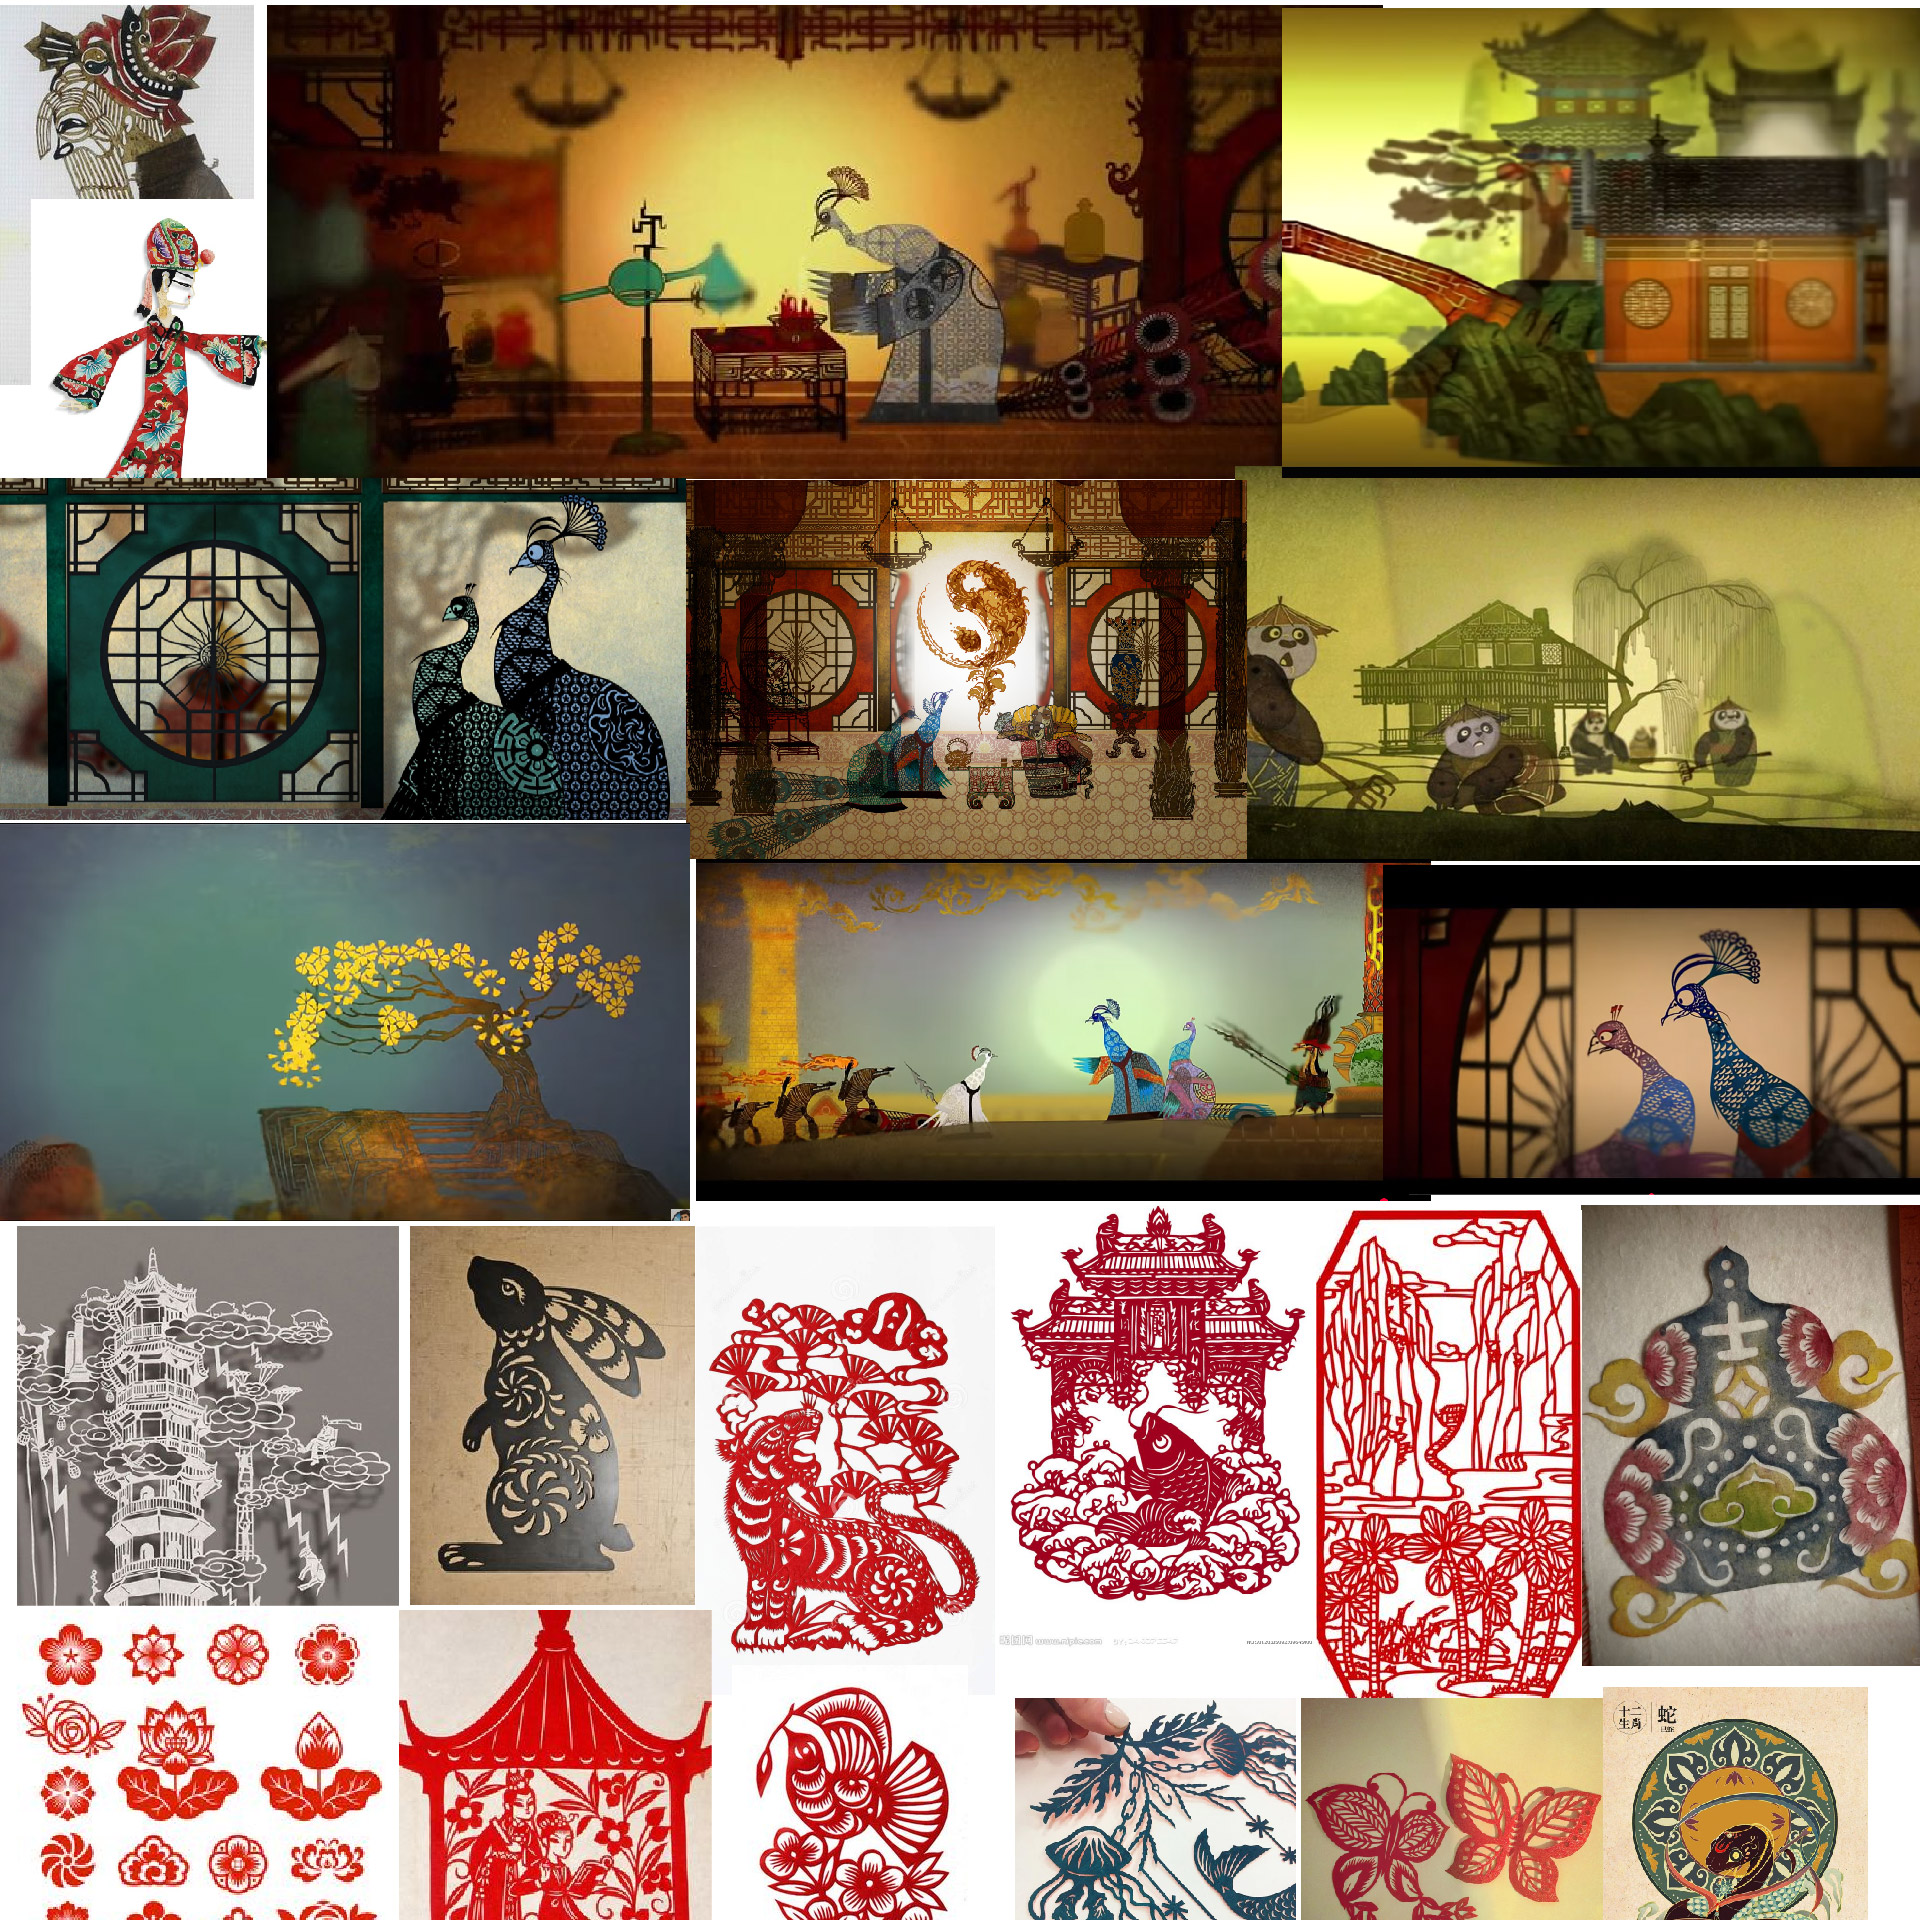
However, since shadow puppetry is ultimately a live performance art, I inevitably need to integrate it with the dynamic style of modern motion graphics in my creation. A great example of this combination can be seen in the opening and closing animations of Kung Fu Panda 2, which effectively blend shadow puppetry with motion graphics.
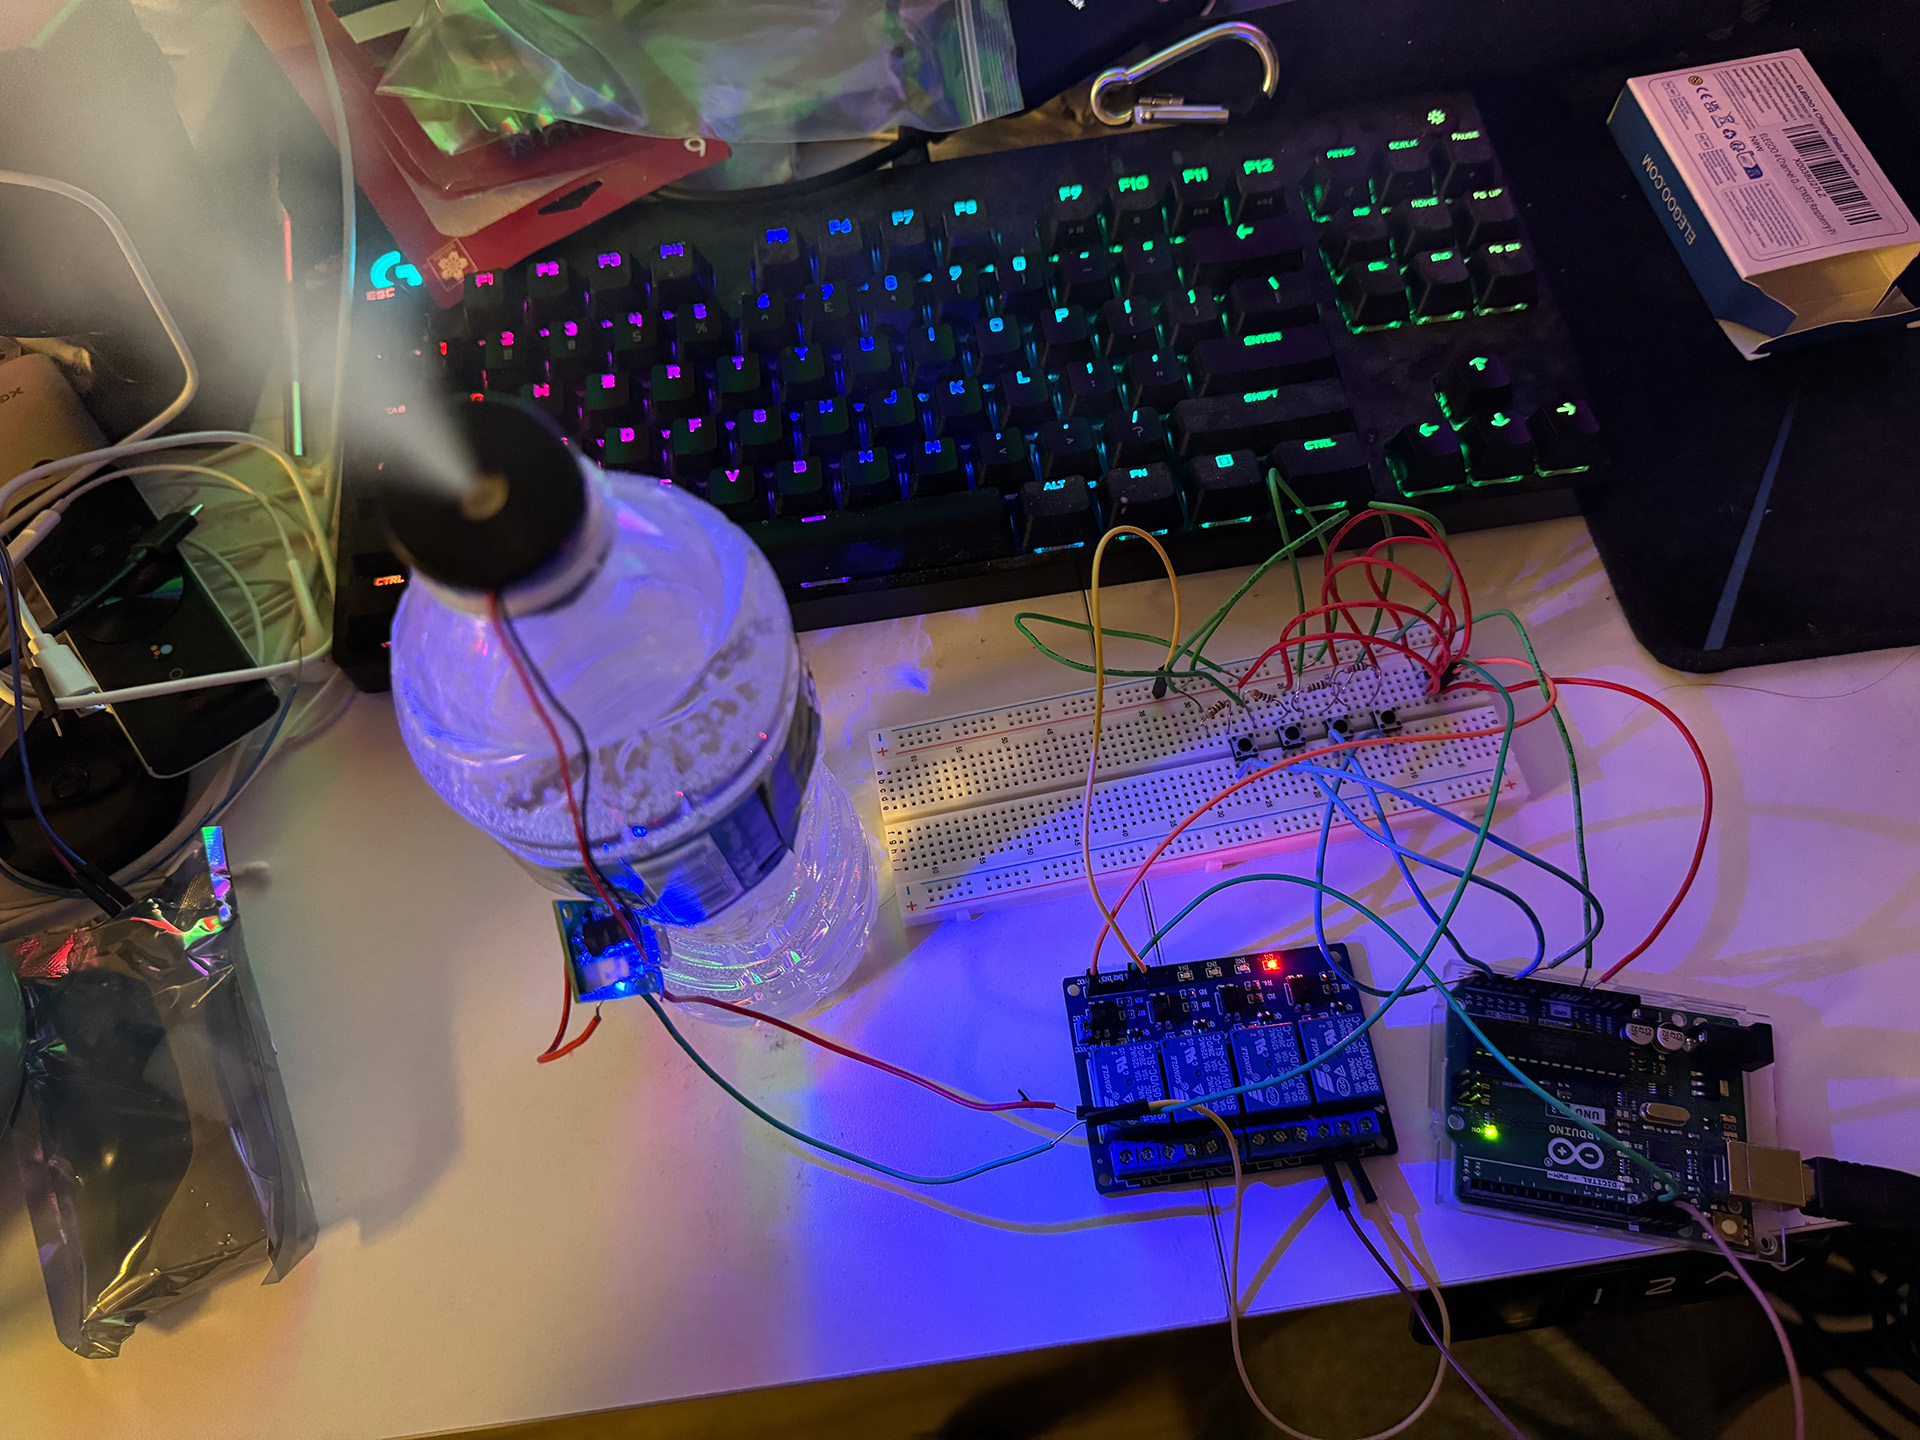
Last week, I discovered that the current provided by the pin was insufficient to power the atomization component during circuit setup. Therefore, I continued experimenting this week and added a relay to the circuit. However, I encountered many challenges along the way. The main issue was that the power source used by the relay itself was different from the power source supplying the component through the relay. Before fully understanding this, I was unable to get the relay to function properly.
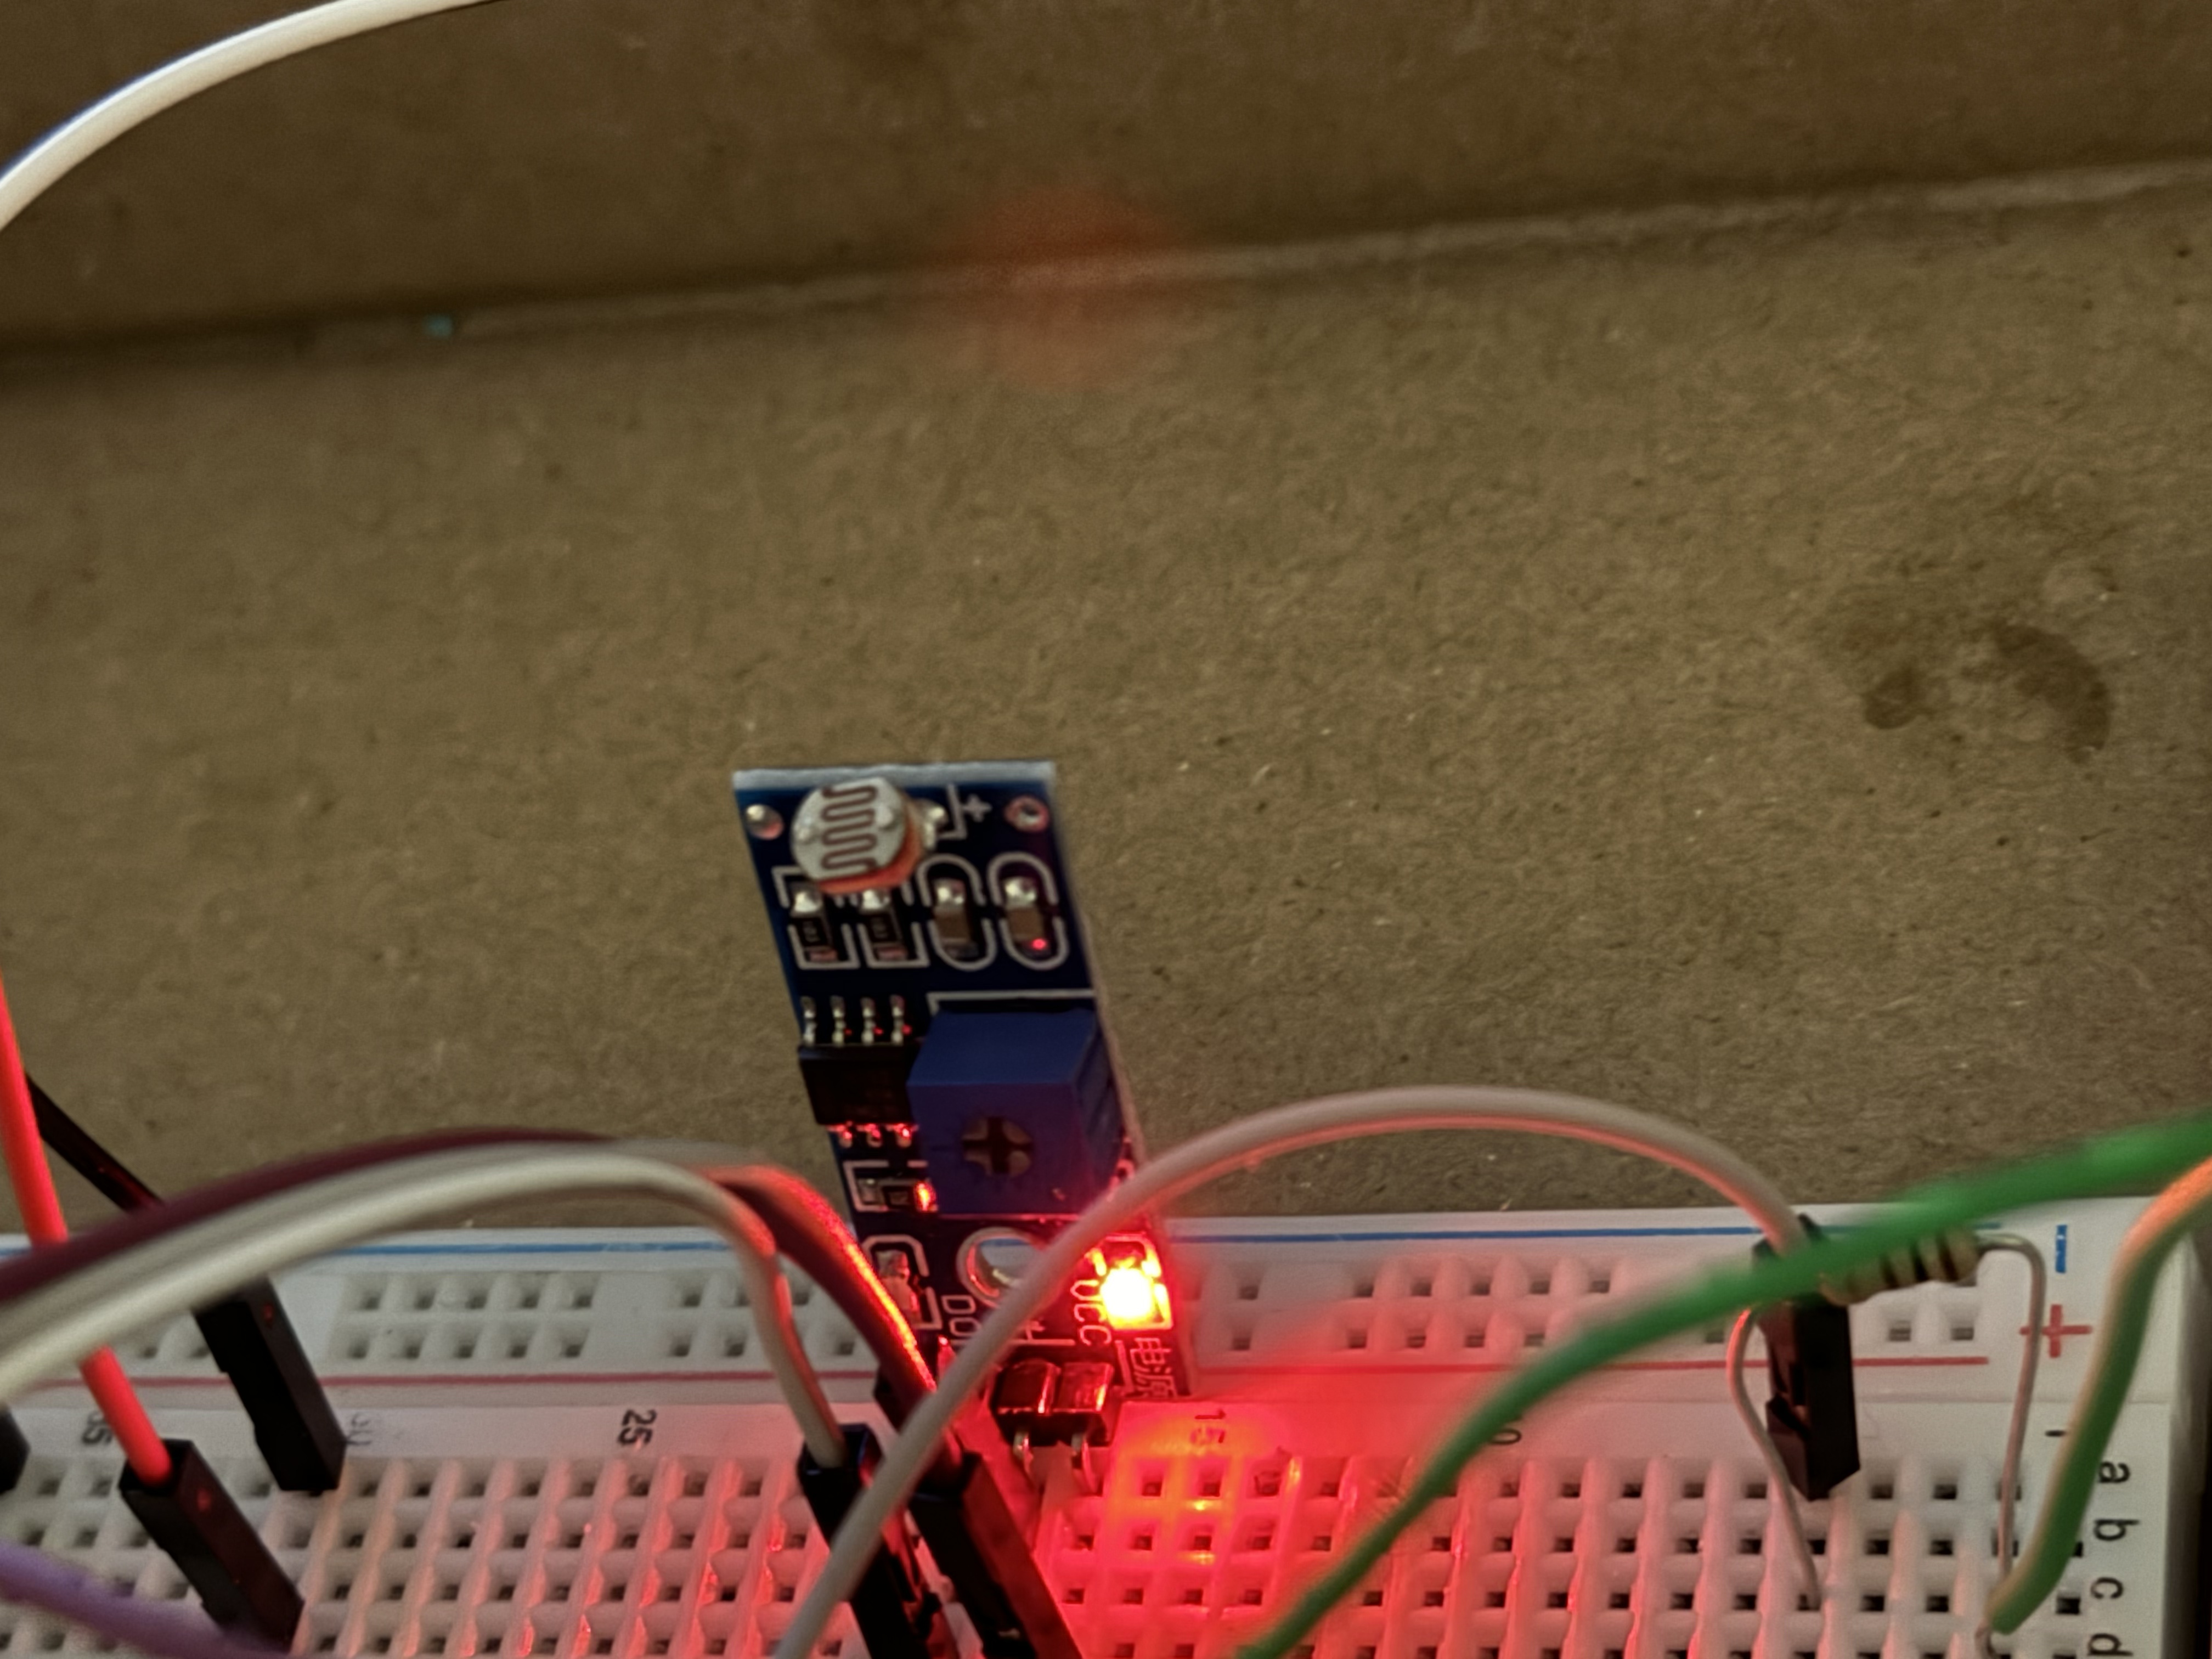
A photoresistor can control a device based on light intensity. It can be installed in a physical interface, such as a box, where opening the box triggers an animation.
A tilt sensor activates interactions when tilted, making it suitable for interactions requiring the audience to flip or rotate an object.
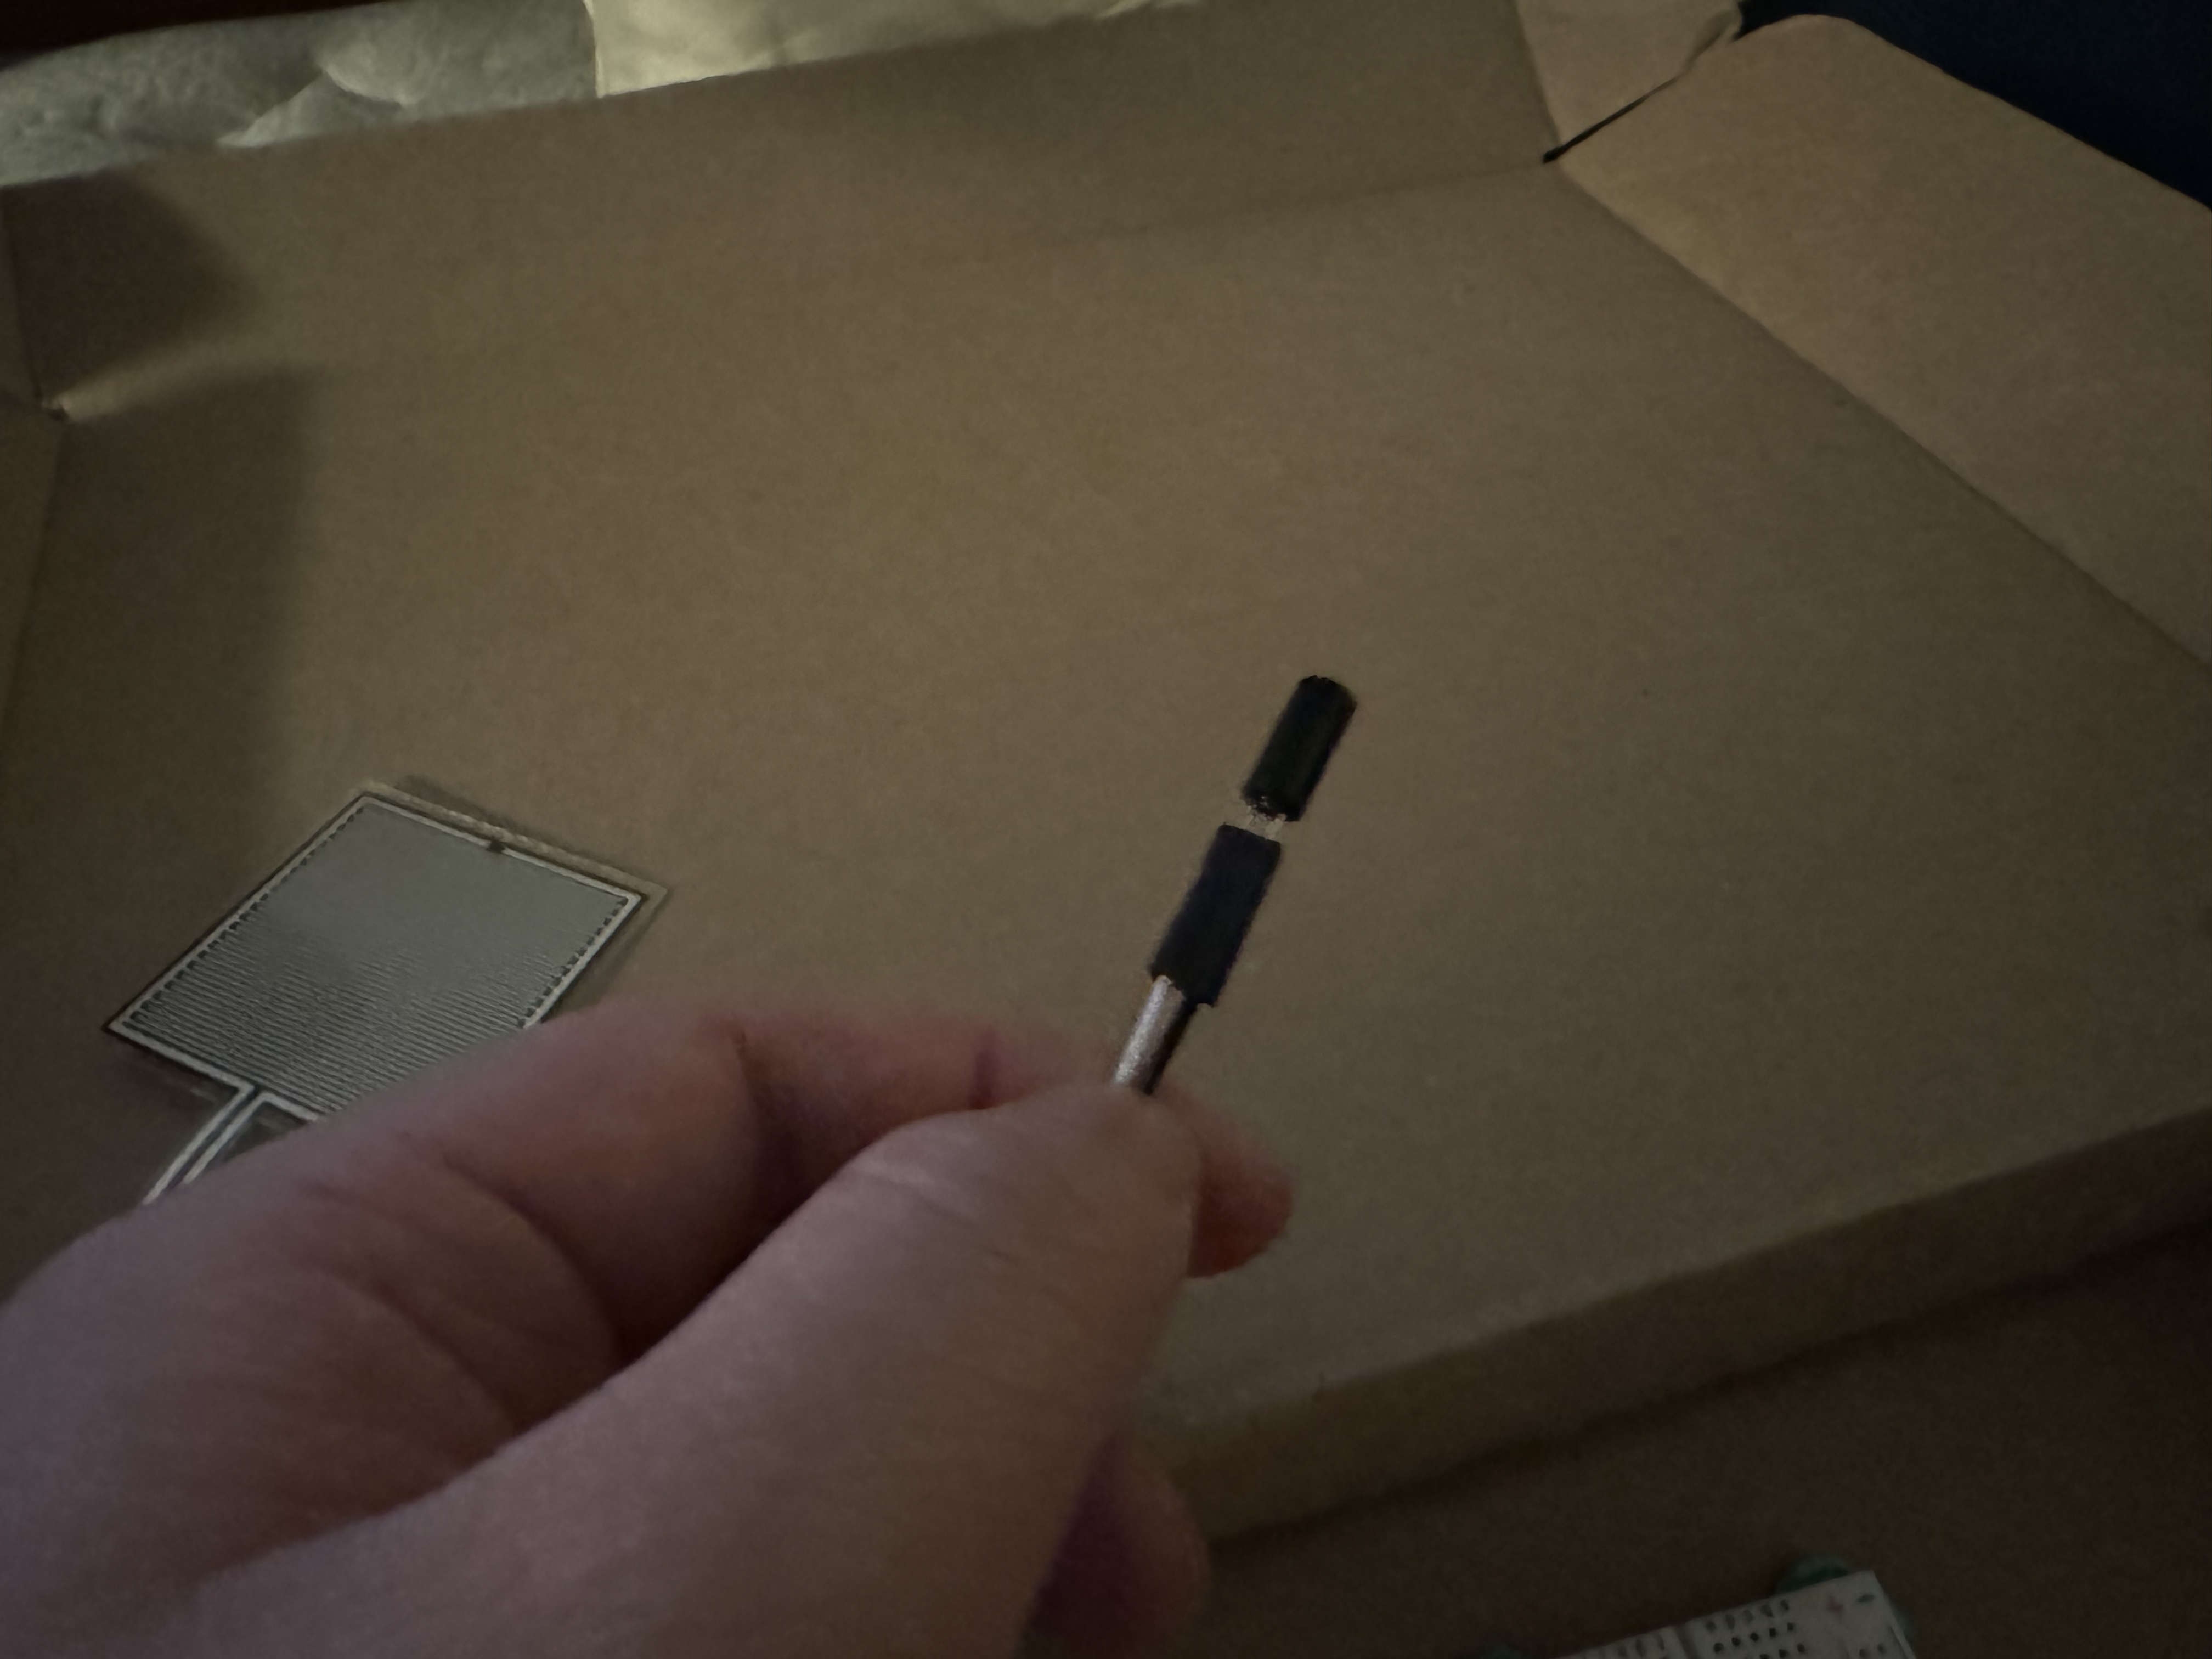
A pressure sensor can detect subtle pressure, making it more responsive than a button. It can be used for interactions where the user triggers the response with their hand or a prop.

A distance sensor can measure the distance of an object in front of it. However, during testing, I found that its sensitivity was relatively low, and its large size made it difficult to conceal, so I decided not to use it.
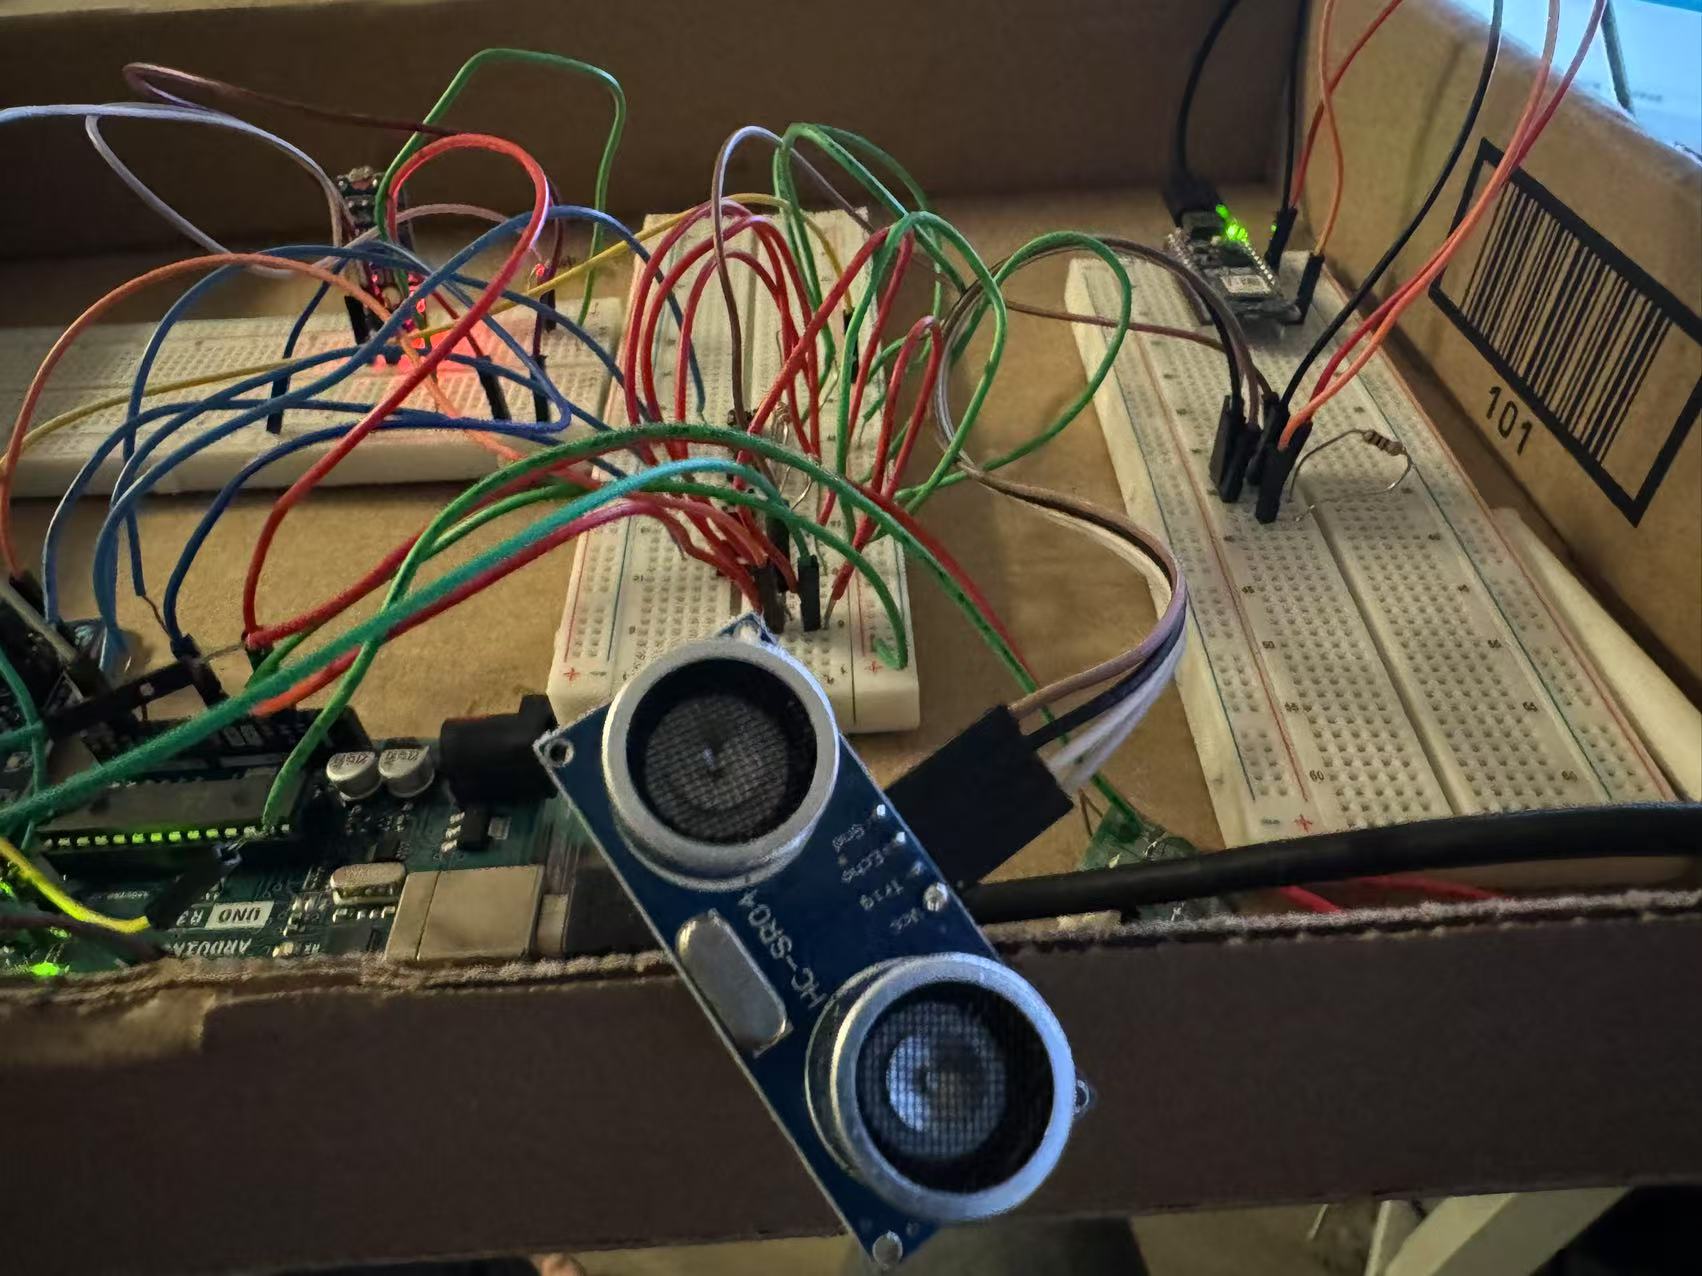
Ultimately, I incorporated the first three sensors into the circuit to replace the previous buttons.